How to implement ‘Fancy PCA’ image augmentation in Python from the paper “Imagenet Classification With Deep Convolutional Neural Networks” Code: here
From the paper here:
The second form of data augmentation consists of altering the intensities of the RGB channels in training images. Specifically, we perform PCA on the set of RGB pixel values throughout the ImageNet training set. To each training image, we add multiples of the found principal components, with magnitudes proportional to the corresponding eigenvalues times a random variable drawn from a Gaussian with mean zero and standard deviation 0.1.
Therefore to each RGB image pixel

we add the following quantity:

where pi and λi are ith eigenvector and eigenvalue of the 3 × 3 covariance matrix of RGB pixel values, respectively, and αi is the aforementioned random variable. Each αi is drawn only once for all the pixels of a particular training image until that image is used for training again, at which point it is re-drawn. This scheme approximately captures an important property of natural images, namely, that object identity is invariant to changes in the intensity and color of the illumination. This scheme reduces the top-1 error rate by over 1%.
Currently I’m working on an image classification problem that has 128 non-overlapping classes with ~180k images in the training set. I’ve been using transfer learning so far, primarily Inception V3 but also VGG16 and ResNet 50. In attempting to improve my results I read the aforementioned paper published by Krizhevsky, Sutskever, and Hinton. The paper has a whole section (4.1) on image augmentation, which has been something of interest to me since my entry March ‘18 in the Kaggle Iceberg/Ship classification contest. In that contest I simply augmented by flipping images over the vertical axis.
For this furniture contest the pictures were scraped from websites and vary in resolution and aspect ratio. Before reading this paper I had been doing rotation and cropping augmentation as part of my picture loading generator. However, this paper introduced something new to me that they called “Fancy PCA”. Fancy PCA uses eigenvalues and eigenvectors from Principal Component Analysis to augment an image while maintaining the features and detail of the image.
Implementing Fancy PCA augmentation into my training appeared to increase the accuracy of the model from ~83% on the evaluation set to ~85%. In comparison, the authors of the paper noted ~1% accuracy improvement for the ImageNet challenge due to Fancy PCA. My baseline 83% model already had augmentation in the form of flips over the vertical axis, random crops, and about half of the time random rotation usually between +-3°. I plan to investigate further to see if a wider range of Fancy PCA scaling helps the augmentation. (ie changing the standard deviation of the normal distribution from which the random alpha values are drawn, in order to increase the amount of distortion)
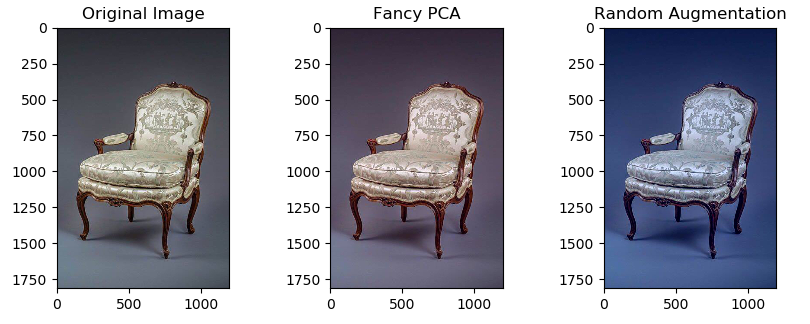
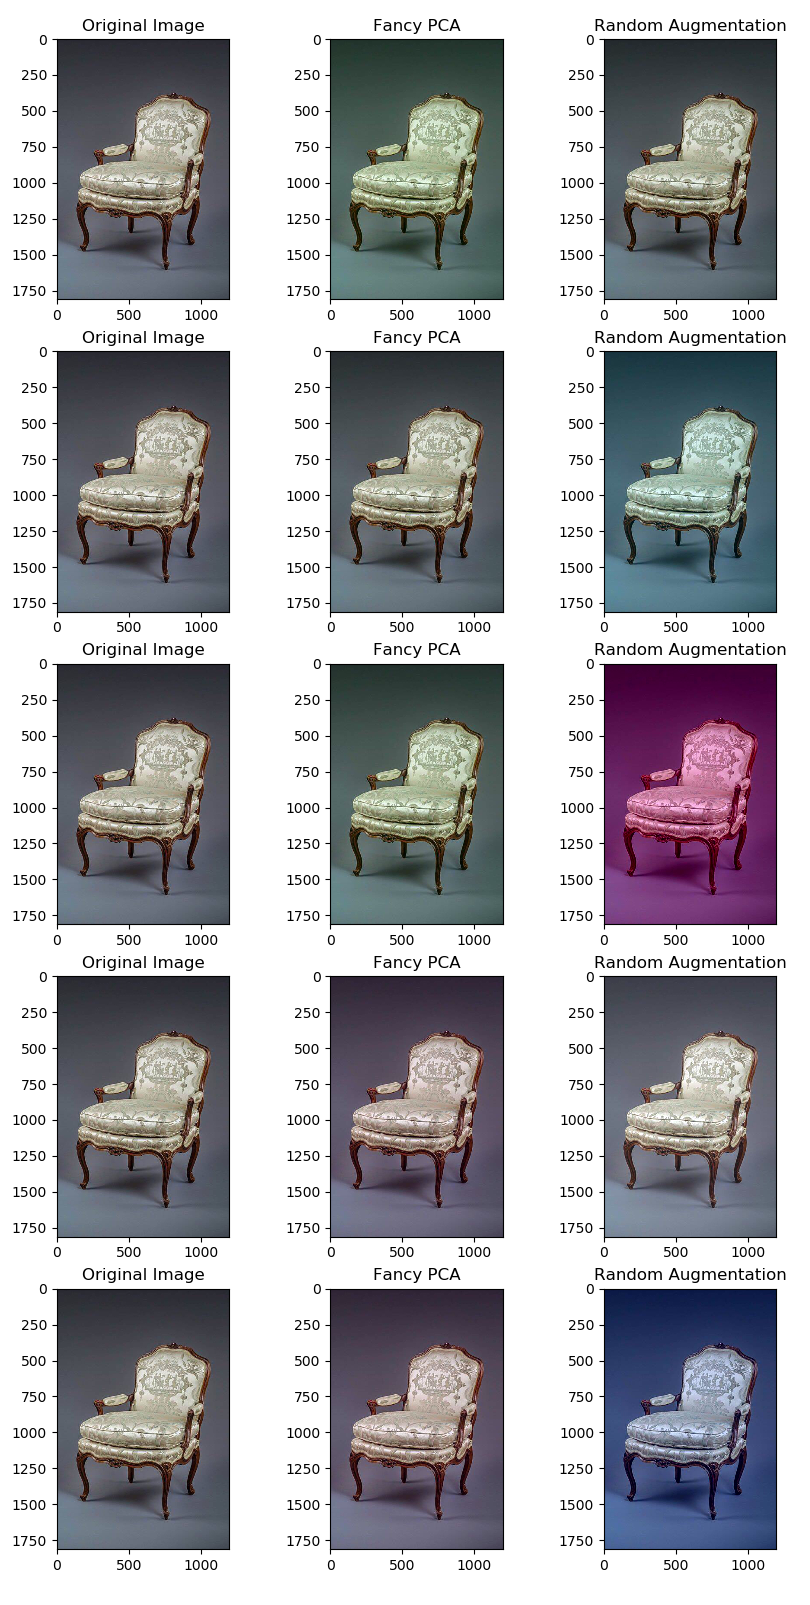
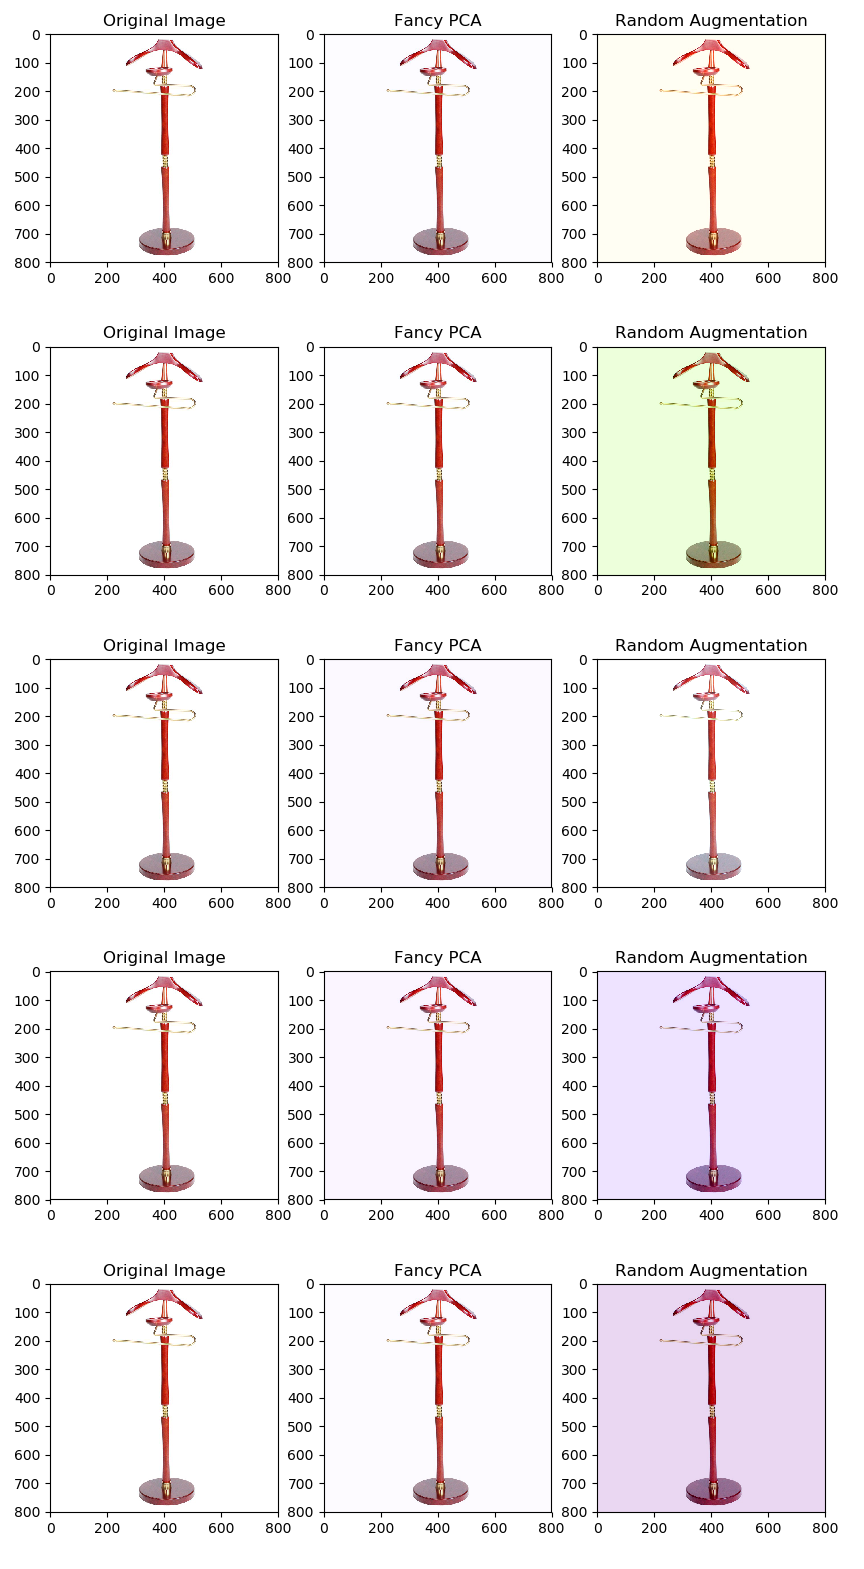
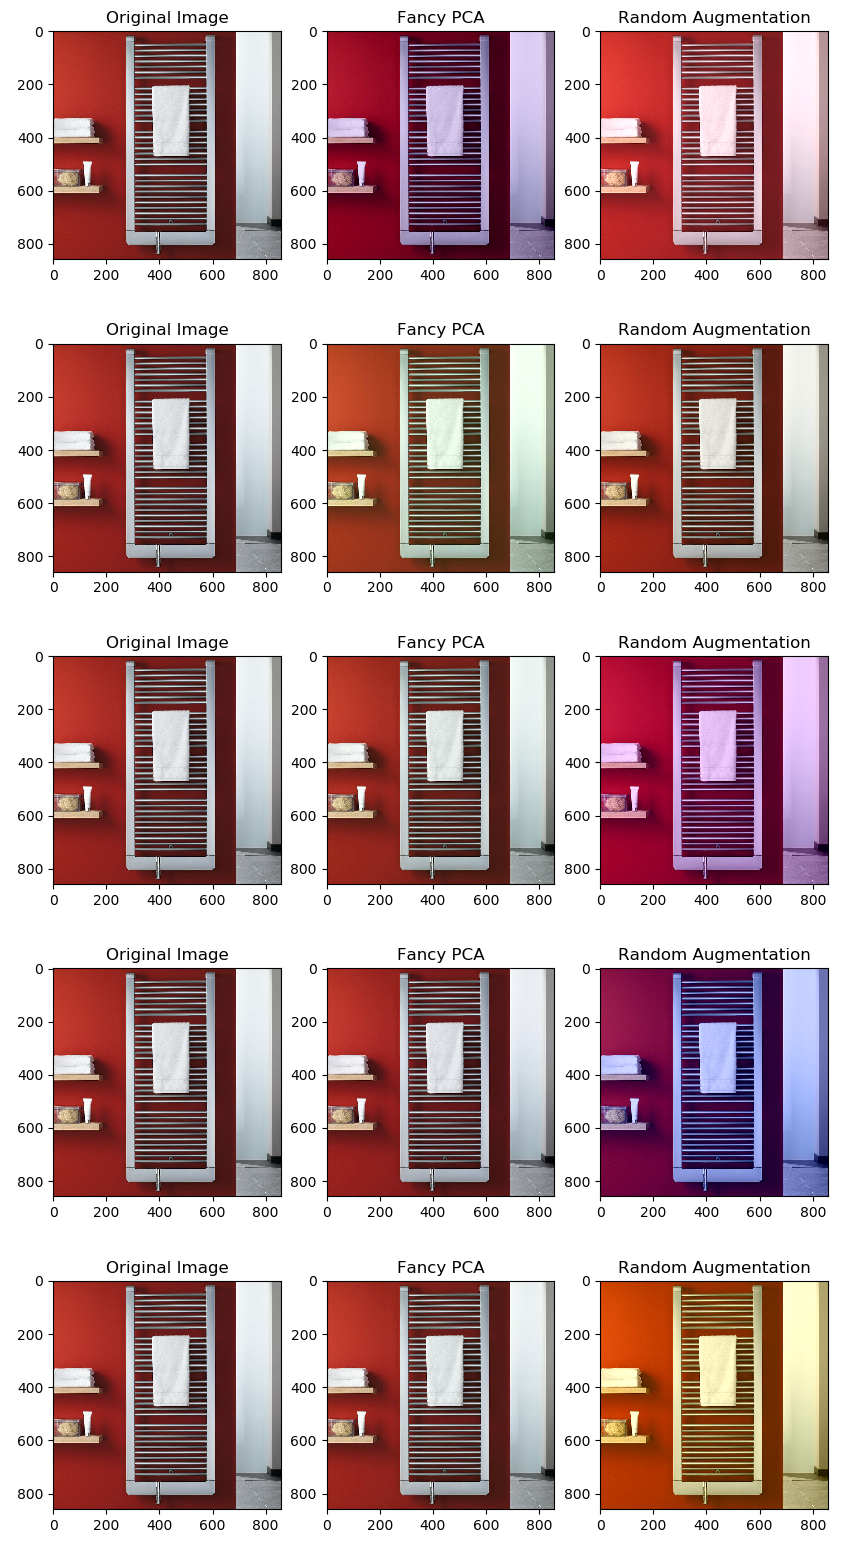
In order to help compare this sophisticaed image augmentation I also included images that were augmented with a brute force algorithm. Specifically in that random values were added to each color channel. (The same value being added to the color channel of every pixel.) For the purposes of this blog post the values of both augmentations have been increased by ~1000x to make the changes more obvious to the naked eye. The order of the picture columns, from left to right, are: Original Picture, Fancy PCA (1000x), and Color Value Added (1000x)
The Python 3 code for Fancy PCA is available here.
It would also be remiss if I did not include the helpful URLs that I used to get this working properly. Resource 1 Resource 2

One can see that the far right images have clownish, rainbow distortions because of how much the color channels have been impacted. The middle images, “fancy PCA”, have been color shifted but the distortion is not as dire despite the large magnitude. The middle image distortion, in many pictures, looks like a temperature based (Kelvin) white balance shift in comparison. Again the distortions are about 1000x the recommended value.

For this rack picture we can see how much the colors are distored in the 3rd column of pictures which is simply adding random values from a normal distribution to each color channel. The white area around the rack is preserved much better by the Fancy PCA in comparison.
